First, my apologies for not having posted any updates for a while; the gap was longer than intended but we have been busy doing quite a lot of work ourselves and time has vanished!
Ian of Reading Office Interiors Ltd completed all of the dry-lining in August. As a result of his diligence, we are confident that every junction and wall is completely true and square. There were some challenging areas notably over the stairs and half landing with ceilings nearly 5m above the floor level but it was all successfully completed by the end of August. This also involved taking out and re-installing all of the temporary staircases; not an insignificant task especially with the lower flight which required 6 of us to get it back into position!
Steve of Steve Pyke Plastering followed on closely behind Ian. Largely on his own but occasionally assisted by Greg on the tricky bits. He made short work of the skimming and plastering which was largely completed by mid-September. There are a few bits to complete including the basement bathroom but this is currently being used as the site toilet facility so can be completed later.
Graham of G T Electric Services has completed the first fix and moved almost seamlessly onto the second fix electrical work. As we are on a 3-phase 400V, 100A supply, much of our installation is being carried out to commercial standards. Consequently, the plant room now has some very robust kit along with the garage area which will form the supply source for any external power including the greenhouse and rainwater pump. Mains power was connected w/c 31 October and all sockets were then live across the site meaning that we could remove a myriad of trailing leads! Despite casting ducting onto the basement walls before we backfilled, we still had problems getting the mains cable into the basement. We ended up having to install a new duct through the walls as the original one had a bend in it which was impossible to navigate with 25mm main core cabling.
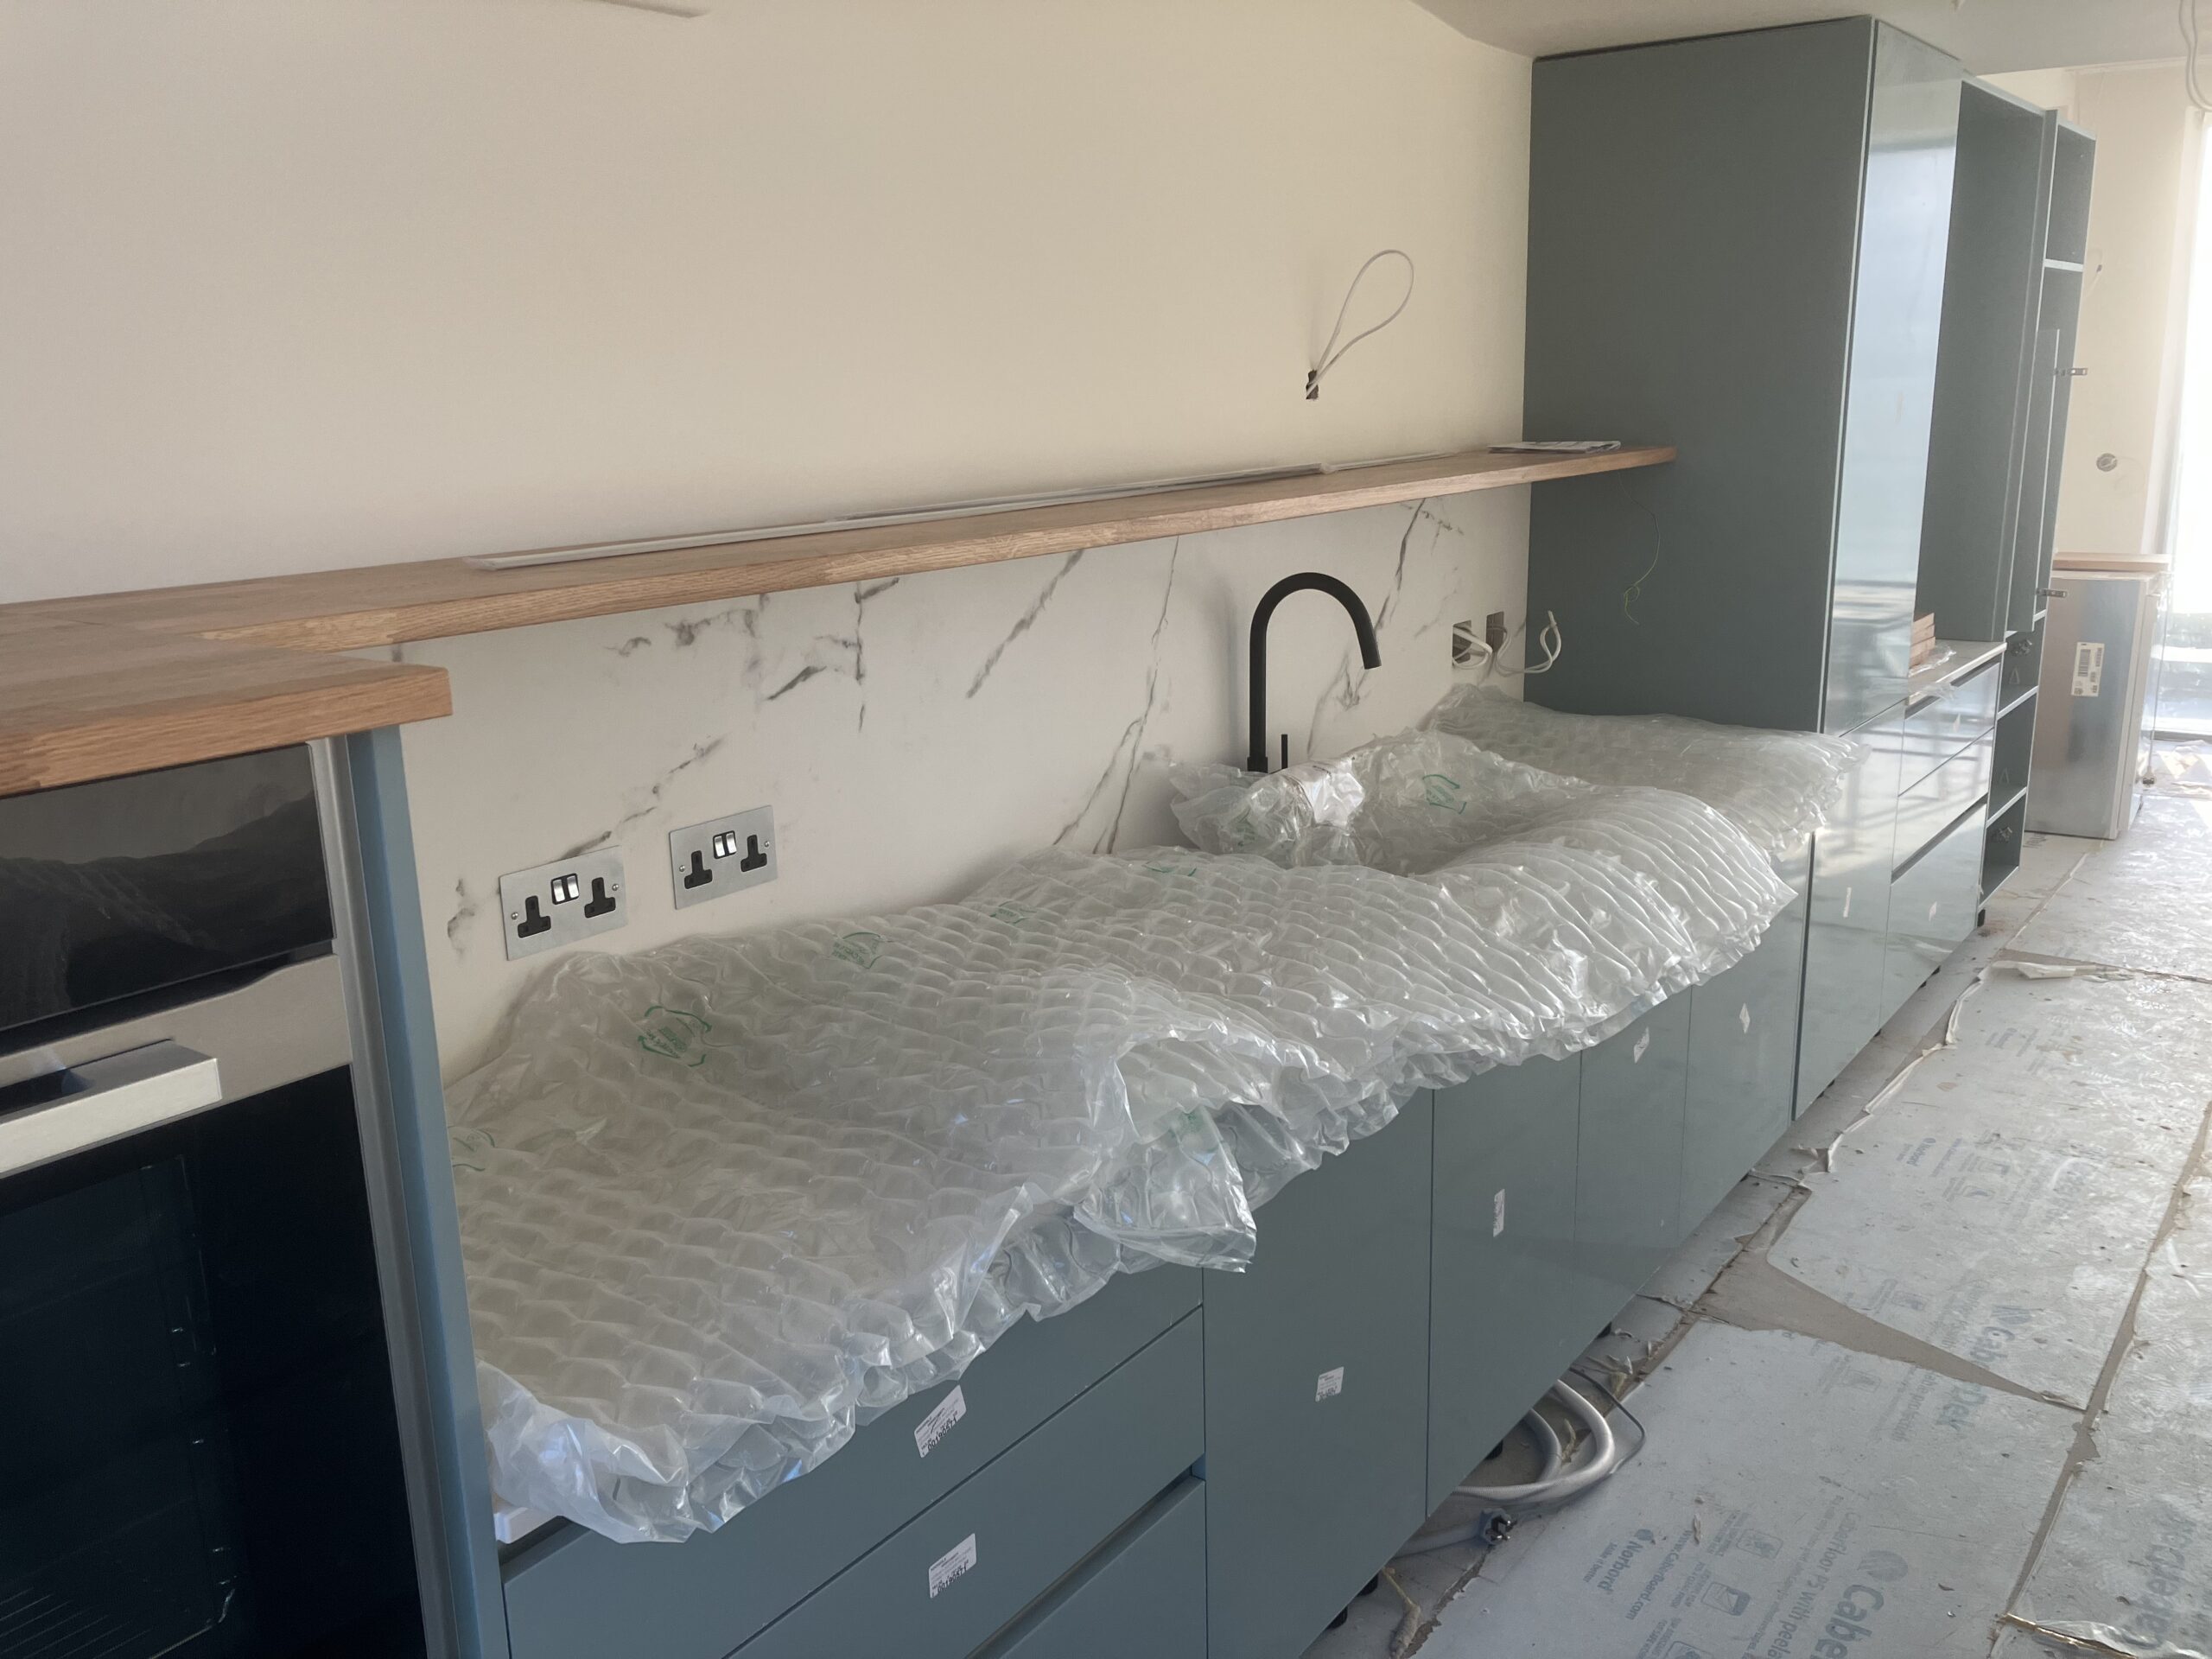
Simple Kitchens have installed the kitchen on the top floor and it is looking fantastic. Nigel and Jason have been the installers, along with Marble Workshop who supplied and fitted the Dekton Kairos work tops. The latter are man-made porcelain from Spain which should be impermeable to heat or stains. The tall cabinets proved to be a tight fit under the gulley area of the roof. Thankfully, our calculations and drawings on SketchUp once again proved accurate and we had a few mm to play with! We had to procure a teleporter to lift the worktops up to the top floor; being 3m long and weighing 135kg there was not way that they could be taken up the stairs so had to be brought in through the front windows!
Harry and Harry of H J Denison have been in and out on a regular basis installing the bathrooms and kitchen plumbing as the work by others has progressed. All of the bathroom fixtures and fittings have been supplied by Wallingford Tiles & Bathrooms, now based in the village. We also have one Showersave on each side of the building so that waste water from showers and sinks will be used to pre-warm incoming hot water.
Our tiler, Raffa, has been busy fixing and laying tiles in the bathrooms along with the utility room floor. The tiles have been supplied by Wallingford Tiles & Bathrooms, and Didcot based company, Natural Stone Tiles.
The Hormann sectional electric garage door has been supplied and installed by local company, Wolverine Garage Doors. The garage doors are in the same Winchester Oak foil as the 2 doors at the front which are a surprisingly close match despite coming from different suppliers.
We have had to carry out a small re-design of the flooring make-up on the top floor. The heat loss calculations indicated that we need a 1kW underfloor heating mat across the front of the main picture window (the only underfloor heating in the house). However, we have a floor depth of 24mm to play with comprising 21mm engineered oak flooring and 3mm Elastilon underlay. The ProWarm heating mat (1mm) requires a 6mm minimum ProWarm ProFoam underlay. We have therefore had to buy additional 15mm engineered oak timber from East Brothers to match the heights (15+6+1=22mm). There is always a solution to be found!
Our joiner, Graeme, has designed and fitted a structure to hold the Blindspace box and Reese profile wave curtain track in front of the top floor main window. This sounds simple but turned into a geometrical challenge as the roof joists are set at 7 degrees and the 2 boxes for the blinds and the curtains are different sizes. However, it was finally fitted so that both sit at the same horizontal level. It was striking during this process how little the suppliers actually understood how their products worked in practice! They were fine on the showroom set up but were completely incapable of applying this to a real situation.
Our ground workers, Geoff, Ollie, Mark and Mason from G E Groundworks have been busy. Since August, they have:
- Levelled all the rear garden and brought it up to the finished level
- Built a retaining wall between the house and the “shed” to bring the levels to the correct height
- Built a retaining wall from the back door sloping down to ground level at the south side of the property; this has a fall of some 2.75m over about 10m, which will be planed with shrubs in due course
- Installed steps in 2 places on the retaining wall
- Installed the remaining foul, rain water and land water drainage pipes bringing them to appropriate manholes in front of the building
- Sourced and spread 40t of top soil, which disappeared into the rear garden!
- Installed a timber sleeper retaining wall on the north boundary to create a uniform slope along that boundary going from ground level at the rear to ground level at the front, a fall of some 2.5m over 10m; this will be planted with privet hedging in due course
- Levelled the area in front of the house to create the parking area and access to the garage
The list of the work that we have done is growing:
- Installed acoustic insulation to all floors and stud walls throughout
- Completed the Caberdeck 22mm T&G flooring on the landing while the temporary stairs were out
- Completed all of the painting: mist coat and 2 top coats. I can take no credit for this as I was sacked early in the process! Every ceiling and wall on the top and middle floors have been painted including the very high ceilings above the hall and above the middle half-landing.
- Installed 50mm stud work to hold the plasterboard around all of the basement walls which have been waterproofed. This includes the store-room, plant room, workshop and hall in order to retain the integrity of the waterproofing.
- Boarded out the storeroom with 12mm ply and installed shelving on all the walls; this allowed us to empty a storage container which we had been renting
- Boxed in pipes on the top floor and middle floors including the bathrooms. This has included working around the toilet cisterns in all of the bathrooms so that the tiler could work to a straight edge.
- Finalised the garden design for the rear including beds; a water rill and small pond; paved areas; and lighting
- Finalised the garden design for the front including planting beds; parking; and turning areas
- Sourced and constructed Ikea PAX wardrobes for Bedrooms and 1 and 3
- Designed and ordered the utility room fit-out from Howdens